
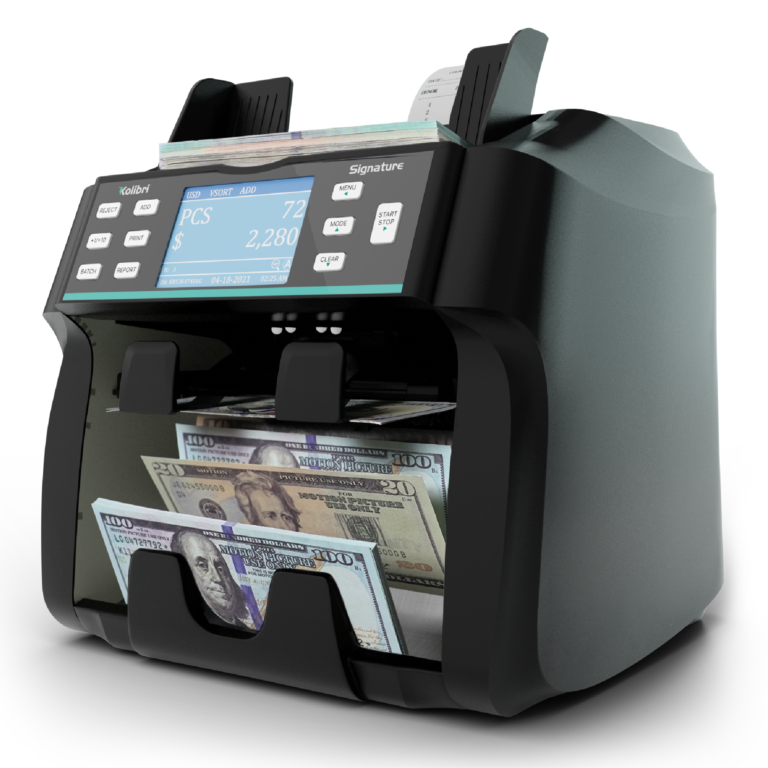
Kolibri Signature has been developed to count up to 1,200 bills per minute, which makes it one of the fastest top loading bill counters on the market. Therefore, to avoid jamming, mis-feeding or other errors, it’s extremely important to use the proper bill loading method. For better results, it’s also recommended to not count more than 200 bills at a time.
Kolibri recommends the loading technique as described below:
- Adjust the bill guides to a size slightly wider (0.10’’ on each side) than the width of the bills in the stack (all US dollar denomination are the same size).
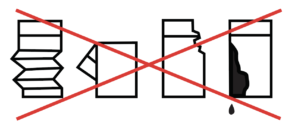
- Correct or remove the bills if they are severely wrinkled, damaged or folded.
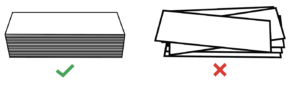
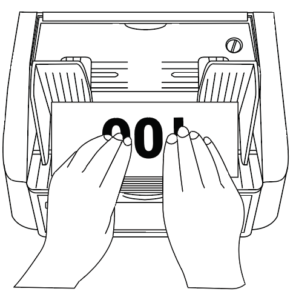
- Square the bill stack as shown below:
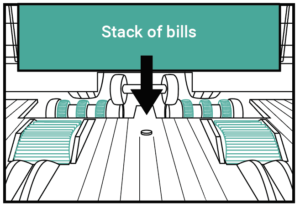
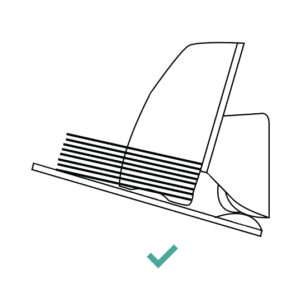
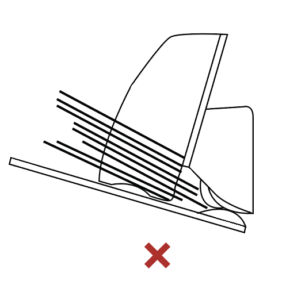
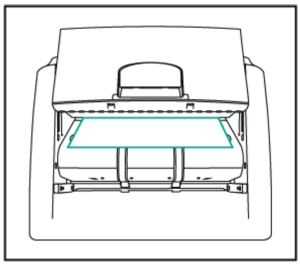
- Place the bill stack flat on the hopper as shown below:
Avoid counting bills that are wet, excessively dirty, spoiled, folded, curled or with foreign material like clips, bands, etc. Bills such as these can cause the machine to malfunction.
If, after using the recommended bill loading method, this does not resolve the issue, please see the support section on the Kolibri USA website at www.kolibriusa.com, or contact Kolibri Support at support@kolibriusa.com for further troubleshooting.
Dirty sensors can cause false errors such as Double and Half errors and may decrease the performance of your Kolibri Signature Currency Counter/Discriminator. It is suggested that the user performs daily maintenance on the unit to maintain top performance.
The unit should always be turned off and disconnected from its power cord before cleaning. DO NOT use solvents such as thinner, alcohol, etc. To clean the machine.
Most operational problems can be avoided by regular care and preventative maintenance. Taking regular care of the Signature will significantly increase its lifetime.
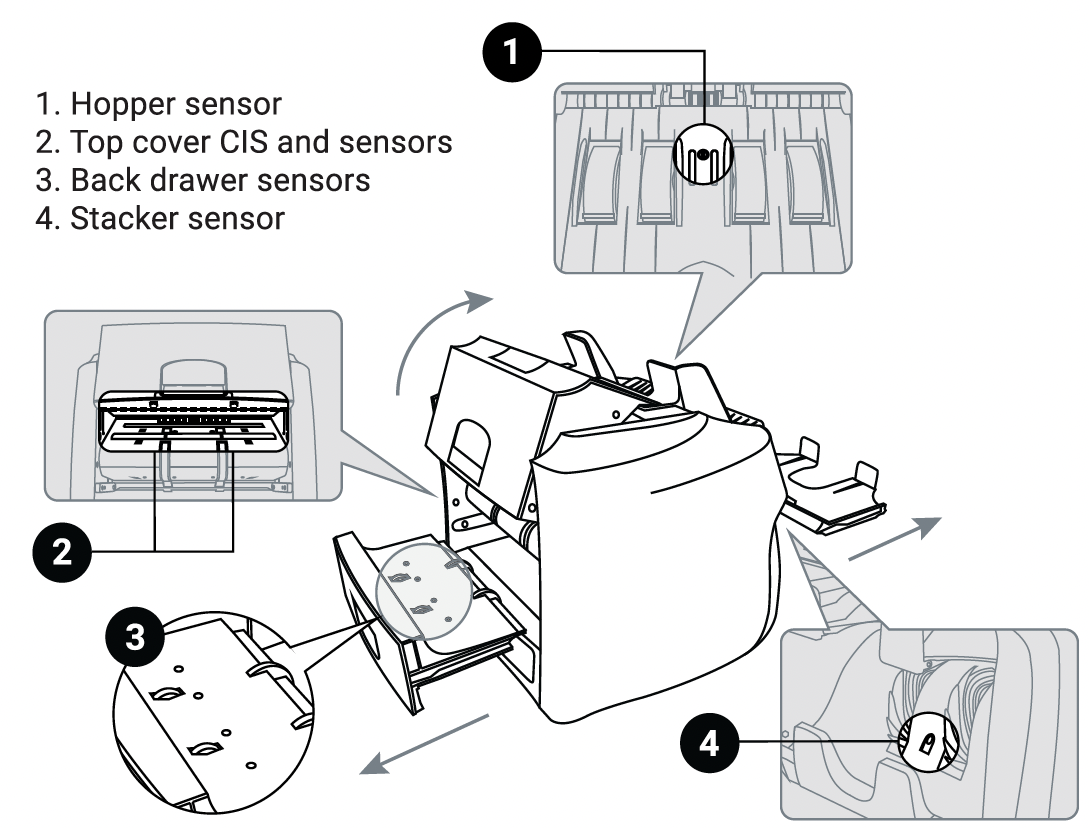
All parts of the Kolibri Signature need daily care and cleaning. Pay close attention to the sensors which are delicate components. If any dust or other foreign matter adheres to the sensors, it may cause various problems during operation of the machine.
- To avoid malfunction caused by foreign objects , please clean your machine everyday
- Clean back drawer with the provided bristle brush or a dry cloth frequently.
- Clean top cover and CIS with provided bristle brush or dry cloth frequently.
- Clean sensors with the provided bristle brush or a dry cloth frequently
- Rubber rollers may be cleaned with a slightly damp cloth, but the soap residue should properly be removed.


Sometimes, during the transportation or shipment of the unit, the adjustment of the feed mechanism may loosen. This can also happen during normal wear or tear and can lead to DOUBLE, CHAIN or HALF errors. The feed gap is the actual height of the bill feed path, and should be tuned to just about the thickness of a single bill. If the feed gap is too wide, the user may experience a high amount of DOUBLE and CHAIN errors which are caused by more than one bill entering the scanning path at one time. If the feed gap is too tight, the unit may not be able to pass bills into the scanning path, or catch on bills and tear them.
The following steps are the procedure for adjusting the feed gap:
- Ensure the machine is turned off.
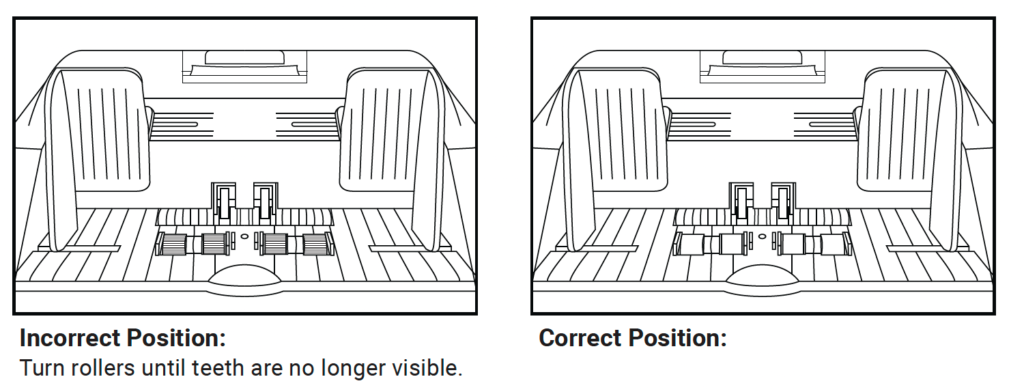
- Position the rollers so that none of the dark-colored rubber teeth are visible. This can be done by turning the kick rollers. Only the black smooth sections of the rollers should be showing.
- Place one bill that is crisp and rigid enough to prevent bending during the adjustment procedure. Place it lengthwise either to the right or left side of the hopper. See image below for examples:
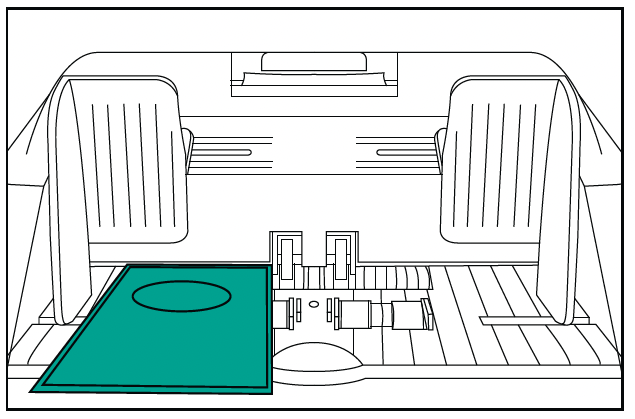
- Guide the bill between the inner rollers during this step; your should feel moderate resistance as you move the bill back and forth through these rollers. In other words, the gap between these rollers is wide enough to pass just one bill per count, but narrow enough to feel a slight tension or friction when pulling the bill out.
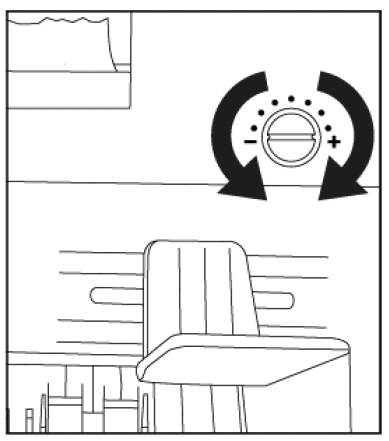
To adjust the bill feed gap, use the instructions below to turn the adjustment screw at the top of the unit:
- Make a 1 dot adjustment turn at a time then retest.
- If the bill feels too loose, tighten the feed gap by turning the adjustment screw counterclockwise.
- If the resistance against the bill feels too strong, loosen the gap by turning the screw clockwise.

The contact image sensor (CIS) of the unit is calibrated properly from the factory. With regular, basic use, the sensor’s sensitivity decreases which can lead to ID errors. To resolve this issue, the unit can be recalibrated using the white calibration card that came with the unit.
Please follow the steps below to calibrate the sensor:
- Ensure the machine is turned ON.
- Press Menu button, move down and select 5. SERVICE, when in SERVICE, select 2. CALIBRATION, CIS will be highlighted, and instructions will be written on the screen.
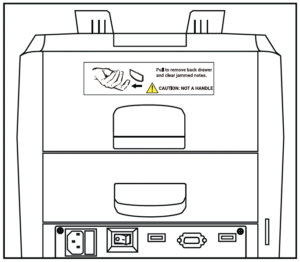
- Then turn the machine backside front. Proceed to pull the top-back cover from the machine upwards.
- Put the provided laminated calibration card inside the top back door opening until it fits securely against the hopper rollers.
- Carefully proceed to close the top back cover with the calibration sheet (white paper card) inside the machine.
- Once the top back cover is closed, turn the machine face side to yourself and press START/STOP button to start the calibration process.
- Calibration will begin and the calibration screen will display a message “CIS check wait”
- When calibration is done “CIS check OK” message must be displayed on the screen. If “CIS check fail” message is displayed, calibration card must be readjusted and placed exactly in front of the CIS sensors and steps 4 to 8 should be repeated.
- When “CIS check OK” is displayed, remove the calibration card from the inside of the machine.
- Reset the machine by turning it off, then on.
- Same steps must be taken for the UV + IR calibration process.
If, after calibrating the unit, this does not resolve the issue, please see the support section on the Kolibri USA website at www.kolibriusa.com, or contact Kolibri Support at support@kolibriusa.com for further troubleshooting.